A Comprehensive Guide on Food Photography Lighting Setup

A Comprehensive Guide on Food Photography Lighting Setup
There may be stacks of crucial components in relation to food photography but none can negate the high gravity of lighting in food photography. The grandeur of food photography is basically reflected through a professional and deft lighting setup. To craft food photography, you need to master the art of food photography lighting setup. Every pro food photographer invests considerable time to set up the lighting perfectly to showcase the scrumptious food items exquisitely laid on a table or any other surface.
Table of Content
- Prior to Starting Shooting (Soft vs. Hard Food Photography Lighting)
- Constant Light Enables a Facile Set-Up
- Go for Strobe Light for Professional Results
- Leverage a Light Modifier
- Make Use of a Reflector
- Emphasize the Manual Settings
- Why not Sidelight and Backlight
- Dos and Don’ts in Food Photography Lighting Tips
- How to Leverage Sidelight and Backlight in Food Photography Lighting
When it comes to food photography lighting, natural light surely rules but relying on natural light is inadvisable due to the inconsistency of the sunlight. To bring out a mesmerizing look of your food photography, you have to pick up using artificial light; you have to know how artificial light will illuminate the food items. Most of the pro food photographers take advantage of artificial lighting to spice up their food photography. With a bit of passion and effort, you can easily learn to set up food photography lighting artificially like a pro.

In this article, we will throw light on the effective techniques of the best food photography lighting setup that will not only glamorize your food items and dishes but also enchant your clients.
Let’s get started….
Prior to Starting Shooting (Soft vs. Hard Food Photography Lighting)

Before you initiate photo shooting, you have to know very well how you want the final output to be. Are you looking for the light to be soft and dimensional or you are more zealous of an appearance showing depth and catchy contrast? No doubt, the subject of your food photography often dictates the style you will choose. Hence, it’s also pivotal to know about the subject you will be shooting in advance so that you can gear up for the job. If the subject is ice-cream, for example, it will surely be brightly colored and so the use of soft light makes sense as it will portray the subject brightly and stunningly.
Constant Light Enables a Facile Set-Up

In food photography, constant light is a must to maintain a steady source of light. The upside of having constant or continuous light is that you can spot the exact amount of light falling on the scene as it stays on. The light source can be the LED light glowing in the room where you are doing the photography. If you are a novice, you can sharpen your food photography lighting setup skill with the utilization of constant light. As time progresses and you master the art of shooting amid continuous light, you can initiate using the strobe-light as well.
Go for Strobe Light for Professional Results

If you are looking to work for PR or marketing agencies, having a strobe in your arsenal is a must. Strobe light is more powerful as compared to constant light. If you are intending to go for food blog photography, you require a minimum of 300 watts of power. If the gig is for any advertisement, you have to be well-equipped and have a more powerful strobe in your studio. Strobe light basically comes with a modeling lamp placed on the head of the strobe. It’s a tiny continuous light source that you can switch on to get the glow for your studio food photography composition. No matter whether you deploy strobe light or constant light, your food photography lighting setup modus operandi is analogous.
Leverage a Light Modifier

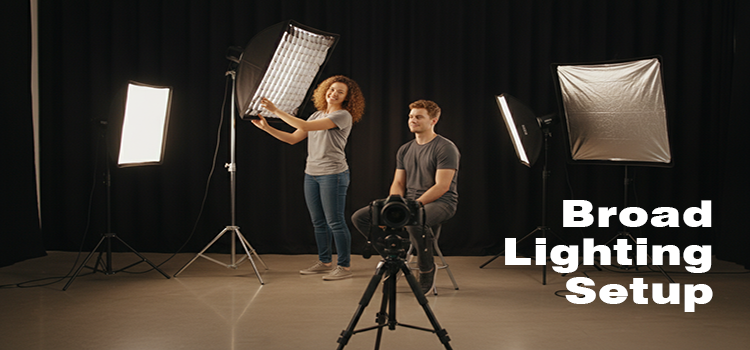
Light modifier is a handy photography lighting kit and pivotal than the light source you are working on to some extent. This is because it allows you to regulate the amount of light falling onto the subject as harsh light can wreck the entire scene. As a passionate photographer, you have certainly witnessed harsh lighting effects from an on-camera flash that blights the scene creating an unflattering, imbalanced, and washed-out appearance. But by deploying a light modifier, maybe a diffuser, you can scatter the harsh light and soften it producing a more natural, balanced, and enchanting look.
Likewise, you can also make use of a softbox that traps the light and lets it move through a diffuser onto the subject. Softbox comes in various sizes as well as shapes and a useful tool for food photography lighting. It produces a soft light and evenly lights up the surface of the food photography eliminating the harsh shadows on the edge. On top of that, it can also act as a secondary lighting source refining the overall lighting impact to create a more natural state of your food photography shooting spot.
Make Use of a Reflector

If you are looking to bring lighting perfection in your photography scene, taking advantage of a reflector is a great idea. Reflector doesn’t create any new light rather redirect the existing light to the direction where it’s pointed. Food items have got a variety of shapes, sizes, colors, and components. While shooting different food items, existing light may not fall proportionately on the entire subject. This is where a reflector comes into play as it can be pointed towards the direction where light is deficient to fill in the deficit. Reflector fixes the issue of odd shadows falling on the subject as well.
Emphasize the Manual Settings

The advantage you achieve through manual settings is that you can take complete control of the appearance of your food photo. Enrich your knowledge about the trifecta settings, i.e. aperture, ISO, and shutter speed. If your knowledge about these camera settings is adequate and deep, you can set the values of these components accurately with respect to the ambient light. Depending on the amount of light present in the room and the subject, you have to adjust the settings of the trio. In order to avoid overexposure and underexposure of your scrumptious food photography, perfection in the manual settings is crucial.
Why not Sidelight and Backlight

Sidelight and backlight assist you to fill in the deficit of existing light in the shooting spot many a time. When it comes to food photography, they are very handy to illuminate the minute details existing on various food items. Not only these supplementary lights brighten the food items but also bring naturalness if utilized appropriately. No doubt, using these light sources is also challenging as they enlighten one facet of the subject and so they need to be used wisely and smartly to bring out a balanced exposure.
Dos and Don’ts in Food Photography Lighting Tips
Some easy but key actions in food photography lighting can do wonders for your gig. We often overlook them but putting them into action can bring the perfection you are looking for easily and smoothly.
Scatter the light: If you are deploying strobe, you are certainly getting a strong beam of light. Diffuse the light with a diffuser or softbox to soften the harsh lighting effects.
Switch off the indoor lights: Contrariwise, if you are using a continuous light in a room, it’s likely to spoil your indoor food photography as indoor lights have color temperatures that can produce unsightly color casts on the image. It’s a tough job to resolve even during post-production. So, turn off the indoor lights during photo shooting.
Don’t Forget to allow yourself Space: Remember, when you are operating with artificial light, it’s mandatory that there is sufficient room between the light source, diffuser, and reflectors for their exact functioning.
Be Cautious of the Luminosity: Unlike natural light, artificial light doesn’t fall off rapidly on surfaces. It tends to catch even the sheds of shine on a variety of surfaces. If you are leveraging backlight or any shiny prop, you have to be wary of the shines they splash and position them wisely. Try to use old objects having patina to avoid shine and bring out perfectly exposed lighting effects.
Say no to White Initially: Shooting food items on white surfaces or even shooting white food items isn’t a good idea if you are just kicking off. As a newbie, you will muddle things and your images will come out looking grey. You have to notch up deep and holistic knowledge about the light effects in your final outcome from different distances and heights and then you work with white surfaces and items.
How to Leverage Sidelight and Backlight in Food Photography Lighting?
We have already discussed the importance of sidelighting and backlighting to bring perfection to your food photography lighting impact. Let’s discuss the usage of these two crucial components that are pivotal for a professional food photography lighting setup.
Sidelight is placed directly beside the food to let light radiating from the side. You can place the sidelight right or left, depending on the needs. It’s a handy component for food photography and works well with most of the setups. Typically, sidelighting is set up with a softbox positioned close to a table. Softbox diffuses the light emitting from the light source. Using a bigger light source lets the softbox softens the light extensively. This enhances the image dimension and produces a striking food photography appearance.
Next, place a reflector or bounce card opposite to the light. Move it closer or farther away depending on the number of shadows you need on the side of your food. Shadows, however, are necessary even for white or airy scenes.
When it comes to the backlight, it’s placed just at the back of the food whether upright or in an angled position. It helps to portray food photos fetchingly bringing out a gleaming look and texture. It also supplements sheen and highlights the liquid properties of food. But it’s also a tricky component to work with as it can cause serious issues with the contrast if not handled deftly. High contrast at the back of the photo will showcase a blown-out scene with a loss of detail. Low contrast, on the contrary, can produce a washed-out photo. These incidents happen with the radiation of the exorbitant amounts of light.
Another issue with the backlight is that it can illuminate one side of the food keeping the other side dark. For tall food items like a heap of cookies brownies, or burgers, backlighting is ineffective as it’s tough to bounce sufficient light back on the front of these items.
Hopefully, the above hacks on food photography lighting will come in handy for your food photography gigs. Lighting puts a huge impact on food photography whether placed on plates, bowls, or other crockery items and having in-depth knowledge of the minute details of lighting is essential to nail your project. As a beginner, while working with the artificial, you can rely more on the sidelight than the backlight. After you feel comfy and confident with the backlight, you can go for a backlight.
A quick recap of the takeaways from the write-up- handy tips on how to carry out food photography lighting, key actions to perform and avoid while doing the job, and telegraphic information on the concept of sidelight and backlight.
Shield yourself from the outbreak of COVID-19.


