How to Add a Blue Sky to your Real Estate Photography in Photoshop
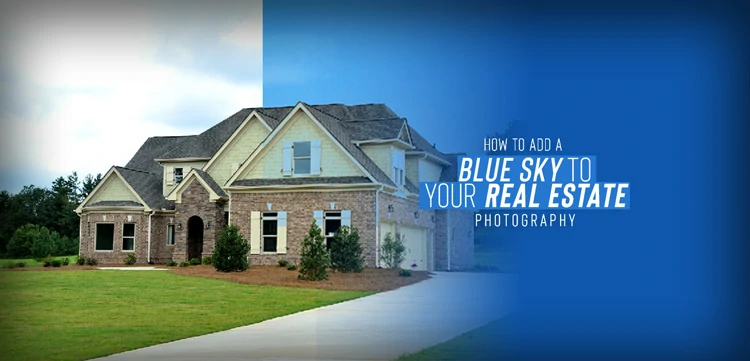
Real estate photography is full of fun, isn’t it? If you are a real estate photographer, you often take long shots covering a large area. No matter whether it’s interior or exterior real estate photography, you go for long shots. If it’s exterior real estate photography, besides the house or building, you also incorporate the sky in your shots.
But many times, you may wish for a blue sky in comparison with the environment but that may not show up in that location at that time. You can, however, go for the shots even with a cloudy sky. Why? This is because, with Photoshop, you can easily and simply add a blue sky to your real estate photography replacing the old sky.
You may also read– How to Replace Sky in Photoshop.
How to Add a Blue Sky in Real Estate Photography
Well, this is what we will show you in this step-by-step tutorial. So, have the patience to follow the tutorial till the end!!!
Let’s get started…
Open your Original Real Estate Image
First and foremost, go ahead and open your original real estate image in Photoshop. For that, go to File at first and open the image. Make sure the sky is cloudy so that you can differentiate between the two after adding a blue sky to the image.
Duplicate the Background Layer
Next, duplicate the background layer as a back-up so that you can make necessary tweaks later on to the image without affecting the original image. In order to duplicate, select the layer and right-click the image.
A list of items along with “Duplicate the Layer” will show up immediately. Select “Duplicate the Layer” from there. Alternatively, you can simply press Ctrl + J to duplicate the layer.
Place the Blue Sky
As the purpose of this tutorial is to add a blue sky to your real estate photography, so we have to place a blue sky on the existing image. To do that, go to the menu bar and select the File tab. Hover over click the item “Place Linked” from the drop-down menu.
Adjust the Blue Sky with the Existing Image
Immediately after that, the blue sky will show up in the original image. Now, you have to adjust the blue sky with the original image so that the sky positioning and placement go right. Then, click the checkmark appearing on top to set the image.
Swap the Background Copy Layer with the Sky Layer
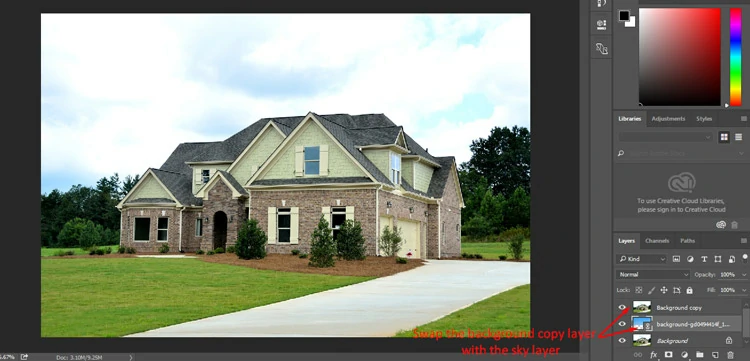
Now, go ahead to replace the background copy layer with the sky layer. For that, click and drag the sky layer above the background copy layer as indicated in the screenshot below.
Select the Color Range
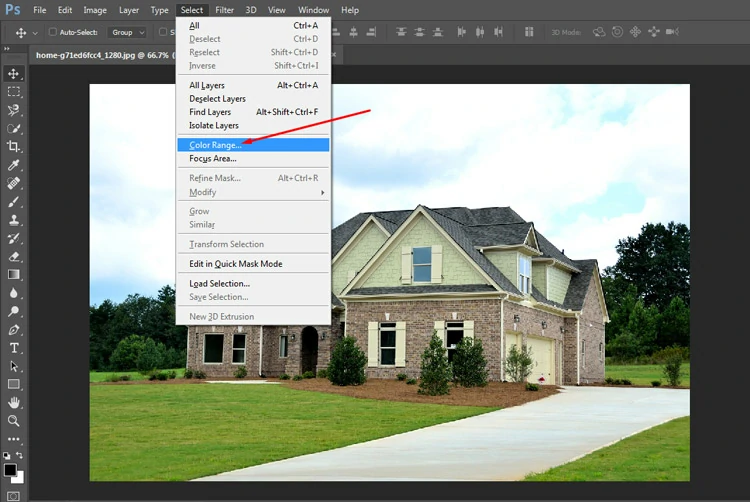
Now, it’s time to swap the existing sky with the blue sky on the image. So, go ahead and click the “Select” tab on the menu bar. Then, navigate and click the “Color Range”.
Adjust the Color Range Parameters
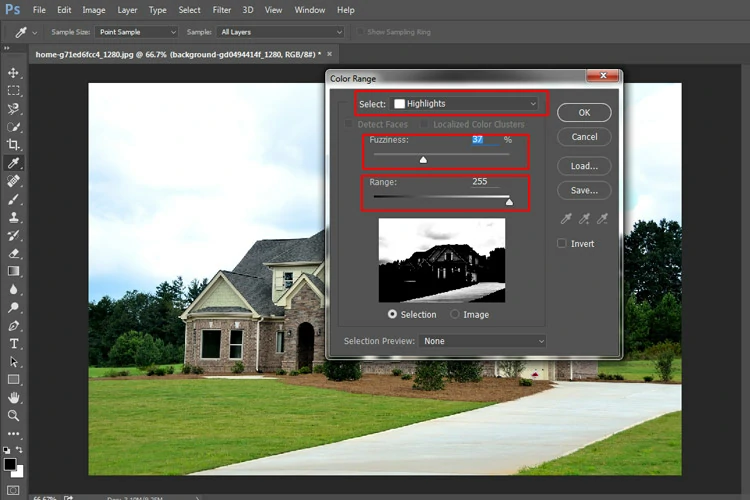
Instantly after that, a dialog box will appear with color range parameters. You need to set and adjust these parameters. Set “Highlights” to the “Select” option. Adjust Fuzziness and Range in a way so that the sky area shows up white and the rest of the part appears black as much as possible. Hit the Ok button then.
Selected Areas of the Real Estate Image and Replaced Sky
With that, the black areas will show up with selection which means this part will remain intact while the white areas, that is, the sky areas will be replaced.
After the selection applies, the original real estate image will appear with a new blue sky as visible in the screenshot below.
Refine the Unwanted Overlays
As there were minute white areas inside the black areas, some portions of the image appear with unwanted bluish overlays. But this can’t be retained and needs to be removed. So, take an eraser tool from the toolbar and erase these undesired parts from the image.
Final Output after Refining
Once you are done with the refining, you will end up having a flawless real estate image with a clear and crispy blue sky as visible in the screenshot below.
Winding Up
So, how was the tutorial? It’s easy-peasy and full of fun too, right? We always come up with simple, handy, and exciting tutorials for you. Like this one, if you want to unlock more Photoshop features and updates, and also tutorials, do follow our regular tutorials.
You can also follow us on Facebook, LinkedIn, and Twitter to get our regular updates. Until we meet next time, enjoy your time!!!


