49 Must-Know Photography Terms to Take Your Shots to the Next Level

Photography goes beyond taking pictures. It involves mastering light, composition, and technique. Whether you’re starting out or are experienced, knowing photography terms enhances your skills and aids communication with others.
This guide simplifies key photography terms. You’ll understand your camera, composition, and how to take great pictures. Let’s explore these terms and enhance your skills!
Basic Photography Terminology
Understanding basic terms used in photography is very essential if the photographer is to produce a good photograph. Here’s a list of key terms every photographer should know:
1. Camera

A phone has a use of camera to capture shots. It is presented in many forms and all are suitable for various photography purposes.
DSLR (Digital Single-Lens Reflex): This type of camera provides good picture quality and portability, as most models can be used with different lenses.
Mirrorless: Like DSLRs but without the mirror that makes them lighter and much more portable in comparison.
Point-and-Shoot: An easy-to-use, small, inconspicuous camera designed to take small snapshots.
2. Lens
A lens is a curved piece of glass that brings the light waves of an object to focus and so forms the image. It’s important to realize that various lenses have different specifics.
Wide-Angle Lens: Gives a general idea, ideal for land and buildings.
Telephoto Lens: Perfect for enlarging objects far away, perfect for taking photos of animals and athletes.
Prime Lens: Motivated by having a fixed rather than zoom lens: it provides improved image quality and a faster aperture or a lower f-stop number.
Zoom Lens: This has a zoom option that can be fixed or variable in that it can be changed depending on the user’s need.
3. Exposure

Exposure is simply the quantity of light exposed to the camera sensor. It determines the intensity of an image’s light or its lack of it. Three key settings determine exposure:
- Shutter Speed: The real-time period is available for letting the light fall on the photosensitive material of film and for which the shut is open and controls both the motion and light blurs.
- Aperture: The hole in the lens through which light entering into the camera body is regulated.
- ISO: The measure of how well the camera can capture light. The higher amount of ISO equals better results in low light conditions but with more noise.
4. Shutter Speed

This controls the amount of time the camera sensor is open to light or the shutter opens to light. It is expressed in terms of a thousandth of a second, one-fifth of a second, or more. For instance, fast shutter speeds (1000) stop motion.
These are for low light, and they can record low motion, which is functional for objects moving slowly like a waterfall or a moving car to produce blurred motion.
5. Aperture

The aperture controls how much light enters the camera. It’s measured in f-stop numbers, like f/1.8 or f/2.8.
- A wide aperture (e.g., f/1.8) lets in more light. It creates a shallow depth of field, blurring the background and isolating the subject.
- A narrow aperture (e.g., f/16) allows less light. It creates a deeper focus, keeping more of the scene sharp.
6. ISO

ISO indicates a camera sensor’s light sensitivity. Higher ISO, like 1600, aids in low light but adds noise. Lower ISO, such as 100, offers clearer images in bright light.
Advanced Photography Terms
Once the first set of defining useful words is learned, go for photography terms in the next higher level. These will refine your skills in terms of technique and your abilities.
7. Depth of Field (DOF)

Depth of Field refers to the sharpness of the image in the photographic image space. Shallow penetration just means only a small portion is clear while the rest is hazy. Applied especially in portraits, this technique assists in cutting the subject from the ground.
- Shallow DOF: To do this one should use a low number of the f stop (e.g. f1.8) and select a narrow region of interest. It will bring into focus an unclear background.
- Deep DOF: This can be done with a very small aperture of between f/16 and f/22. It manages to maintain most of the scene as sharp as possible. It is commonly used in landscape photographs.
8. Bokeh
Bokeh is the blur in a picture. It’s often used in portraits to blur the background. The shape and smoothness of a lens’s aperture blades control the blur.
9. White Balance
White balance adjusts your images’ colors to match lighting. It ensures whites are neutral and other colors look natural. Different light sources have different color temperatures:
- Daylight: Neutral light from the sun.
- Tungsten: Warm light, often from incandescent bulbs.
- Fluorescent: Cool, greenish light.
10. RAW vs JPEG
RAW: Image file format where data is stored from the camera sensor instead of internal image processing. Well! Raw files retain more information and one can do a lot of manipulation on them, they tend to be the best.
JPEG: JPEG files are usually significantly smaller and much easier to send to other people. However, they consist of smaller information portions and are more challenging to revise.
11. Histogram
A histogram gives an illustration of a picture’s luminance. On the x-axis, there are shunt tones from the shadow to highlight on the right side of the image. On the vertical axis, you see the frequency with which each tone is used.
An ideal histogram is when there is a distribution of relative tones between highlight and shadow. A histogram may be raised too much on the left side if the image is underexposed and too much on the right side if it is overexposed.
12. Dynamic Range
Signal-to-noise measures the ratio of object brightness to film noise. High dynamic range equipment captures more detail in both shadows and highlights.
High dynamic range photography means that multiple exposures must be taken. This gets a wider area of light and creates a sharper picture.
13. Macro Photography

Macro photography focuses on small subjects like insects, flowers, or everyday items. And, macro lenses capture these subjects in detail. They reveal textures and patterns often unseen by the naked eye.
14. Long Exposure
Long-exposure photography uses a slow shutter speed to capture movement. It’s ideal for flowing water, lights, or star trails. This technique adds a dreamy effect to images. For instance, it makes moving water look smooth, while car lights turn into colorful streaks.
15. Exposure Triangle
The exposure triangle includes shutter speed, aperture, and ISO. These settings work together to ensure proper exposure.
- A wider aperture (low f-stop) allows more light.
- A slower shutter speed gives the sensor more time to collect light.
- A higher ISO boosts sensitivity to light.
16. Clipping
Clipping happens when an image is too bright or too dark, causing a loss of detail in highlights or shadows. This results in areas that are purely white or black, lacking any detail.
Composition Terms
Composition is about arranging elements in your frame. This creates images that are both appealing and balanced. Knowing these key terms will elevate your photography.
17. Rule of Thirds
The Rule of Thirds divides your frame into nine parts with two horizontal and two vertical lines. Place your subject along these lines or at their intersections. Avoid centering it.
This approach makes your photo more dynamic and balanced. It helps lead the viewer’s eye across the image and creates a more pleasing, natural composition.
18. Leading Lines
Leading lines are natural or artificial lines that direct the viewer’s eye to the main subject or through the image. Examples include roads, fences, rivers, or the edges of buildings. Leading lines direct attention to the focal point. They add depth to the image, making it more engaging.
19. Framing
Framing uses elements in your scene to create a frame around your subject. This can include doorways, windows, tree branches, or buildings. Framing isolates the subject, focusing attention on it. It adds depth and context, making the subject feel more intimate and focused.
20. Symmetry & Asymmetry
Symmetry means balancing elements to mirror each other. This can be vertical, horizontal, or radial. It brings harmony and order to an image.
- Symmetry: Often found in architecture or nature (like reflections in water).
- Asymmetry: Asymmetry happens when elements are unevenly spread. It may seem unbalanced, but it adds tension and interest. This draws the viewer’s eye across the entire image.
21. Negative Space
Negative space, or white space, is the area around your subject. It can enhance simplicity and highlight the subject in your composition. It helps avoid clutter in your image and gives the subject more room to “breathe,” making it stand out more.
22. Golden Ratio
The Golden Ratio is a math concept used in art and design for centuries. It’s often shown as a spiral or grid. The main subject then aligns with the curves or grid intersections.
The Golden Ratio, like the Rule of Thirds, creates balance and harmony. However, it allows for more natural subject placement. Additionally, it offers more flexibility in composition than the Rule of Thirds.
23. Balance
Balance in a frame shows how elements are spread out. A balanced image feels stable and harmonious. In contrast, an unbalanced image seems off or unsettling.
- Symmetrical Balance: When the frame’s sides match or mirror each other.
- Asymmetrical Balance: Balance unequal elements by visual weight. Pair a large object with a small, colorful one.
24. Point of View (POV)
The viewpoint in photography shapes an image’s mood and impact. It depends on your shooting position: above, below, or at eye level. Low-angle shots make subjects look bigger. High-angle shots make them seem smaller.
25. Fill the Frame
Get close to your subject or zoom in to fill the frame. This removes distractions and focuses attention on the subject.
Lighting Terms
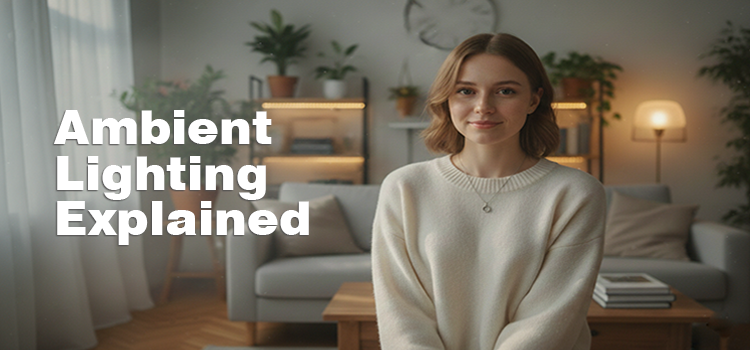
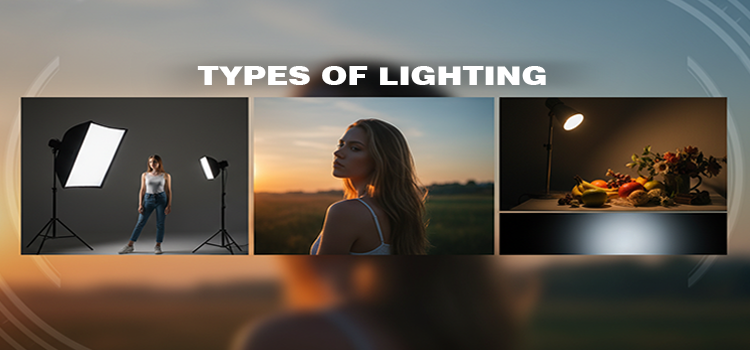
Lighting is vital in photography. It greatly influences the mood, tone, and clarity of images. Here are essential lighting terms every photographer should know:
26. Natural vs Artificial Lighting
- Natural Light: Natural light comes from the sun or sources like the moon. It changes with the time of day and weather. Often, it’s soft and flattering, perfect for portraits and landscapes.
- Artificial Light: Artificial lighting includes lamps, flashlights, and studio lights. It offers control over brightness, direction, and color. This makes it ideal for indoor or controlled photography.
27. Golden Hour
Golden hour is the time just after sunrise or before sunset. The soft, warm light gives subjects a magical glow and enhances skin tones.
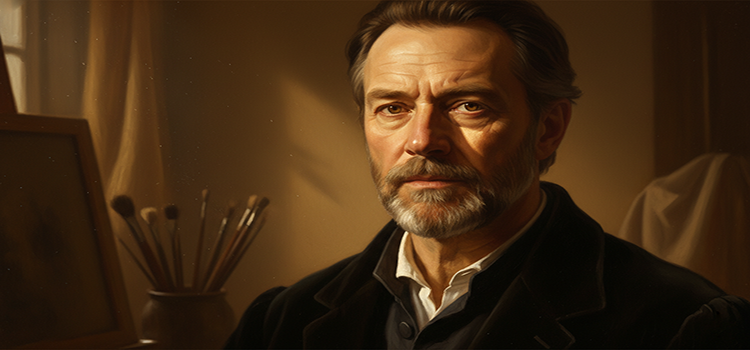
28. Rembrandt Lighting
Rembrandt lighting puts a triangle of light on a subject’s cheek, opposite the light source. It adds depth and interest to the face.
29. Backlighting
Backlighting involves placing a light source behind the subject. This creates a silhouette or halo. It adds drama, highlights shapes or gives an ethereal glow.
Typically, the subject appears dark against a bright background. This method is ideal for dramatic, high-contrast photos.
30. Soft Light vs Hard Light
- Soft Light: Diffused light creates soft shadows and smooth transitions between light and dark. This effect often comes from a softbox or shooting on cloudy days when clouds scatter sunlight.
- Hard Light: Bright, direct light creates harsh shadows and high contrast. This occurs with the sun on a clear day or a bare bulb.
31. High-Key Lighting
High-key lighting makes images bright with little contrast. It creates a positive, airy atmosphere. This technique is popular in fashion, product photography, and portraits. Achieving it involves using soft lights and minimizing shadows for a smooth, even appearance.
32. Low-Key Lighting
Low-key lighting contrasts with high-key lighting. It’s darker, featuring strong light and shadow contrasts. This lighting creates a dramatic, moody effect. It’s popular in fine art, film noir, and portrait photography.
To achieve it, shine a strong light on the subject. Keep the rest of the scene in shadow. This method highlights depth and texture.
33. Hard vs. Soft Shadows
Lighting’s emotive power lies in its shadows, sculpting mood and transforming visual perception.
- Hard Shadows: Shadows have clear edges and appear in images with direct light sources.
- Soft Shadows: Shadows have soft edges and appear with diffused light, ideal for portraits and lifestyle photography.
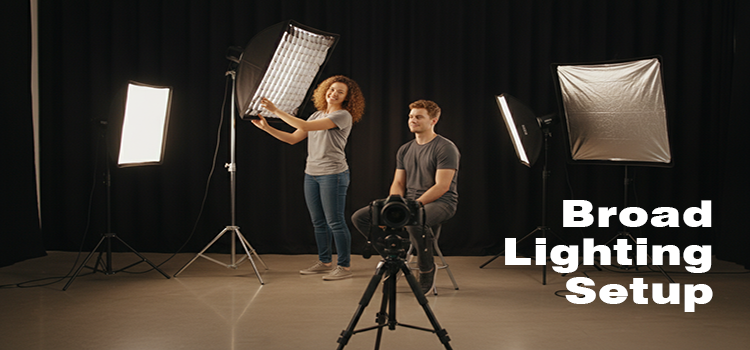
34. Fill Light
Fill light softens shadows from the key light. It balances exposure and reduces harsh shadows without adding too much light. It’s often used in portraits to balance the look. It keeps the subject’s face from being too dark compared to brighter areas.
35. Diffusion
Diffusion reduces the intensity of the light and softens it up for optimum illumination. Any translucent surface can be used for this purpose, including a softbox or an umbrella.
Photographers often prefer diffused light for portraits and products. It enhances skin tones and creates natural shadows.
36. Bounce Light
Bounce lighting bounces the light off an object, such as a wall or ceiling before it can reach the subject. This method diffuses light to decrease opposition and minutest shadows.
It’s perfect for flattering, evenly-lit portraits or scenes. Moreover, it creatively uses available light in both outdoor and indoor settings.
Post-Processing Terms
Post-processing improves your images after taking them. It adjusts exposure, color, and sharpness to match your vision. Here are key terms to know:
37. Cropping
Cropping is cutting out unwanted parts of an image. It enhances focus on a subject or improves composition. This process removes distractions and balances elements better. It’s a simple but powerful technique for improving the overall impact of your image.
38. Histogram
A histogram displays the tonal range of an image, with the darkest shadows on the left and the brightest highlights on the right. It also helps you determine if your image is well-exposed.
A balanced histogram displays a full tone range. If it’s left-skewed, the image is underexposed. Conversely, a right-skewed histogram indicates overexposure.
39. Sharpening
Sharpening makes images clearer by boosting contrast between nearby pixels. It especially enhances edges in photos with fine textures. However, too much sharpening can add noise. So, it’s crucial to sharpen images carefully and selectively.
40. Noise Reduction
Noise is the grainy look in photos, common in low light or with high ISO. And, noise reduction smooths out this unwanted noise while keeping details. Modern software offers tools to reduce noise without losing quality, resulting in cleaner photos.
41. Color Correction
Color correction adjusts an image’s colors for accuracy or appeal. It fixes white balance, tweaks color saturation, and corrects lighting-induced shifts. The aim? To make images look natural or to enhance colors artistically.
42. Dodge and Burn
Dodge and burn techniques lighten or darken parts of an image. They add contrast, highlight areas, or create dramatic lighting. Often used in post-processing, these methods are popular in portrait photography to emphasize features. Similarly, in landscape photography, they enhance texture.
43. Cloning and Healing
Cloning and healing tools allow you to remove unwanted objects or imperfections in an image.
- Cloning: Copies a section of the image and pastes it over the area you want to remove, replicating the original texture and patterns.
- Healing: Similar to cloning, it blends the area with the surrounding pixels to maintain a more natural look.
44. Layers
In photo editing software, layers let you stack adjustments, filters, or text without altering the original photo. You can edit each layer independently. This makes it easy to experiment with different looks or fixes. This method allows non-destructive editing, ensuring you can always revert to the original image.
45. Filters
Filters are ready-made effects that change an image’s look with one click. They adjust colors, tones, sharpness, and more. Photographers often use filters for quick edits or to create a specific mood, like vintage, black and white, or high contrast.
46. Vignetting
Vignetting darkens an image’s edges more than its center. Certain lenses can create this effect naturally. Alternatively, it can be added later to highlight the main subject.
This makes the composition more focused. Photographers often use it in portraits and creative projects to add mood and depth.
47. Saturation
Saturation is the intensity of colors in an image. Increasing it makes colors vibrant. Decreasing it leads to muted tones. Extreme desaturation turns an image black-and-white. Adjusting saturation can enhance visual impact or set a mood.
48. Exposure Compensation
Exposure compensation adjusts an image’s brightness after it is taken. It corrects images that are too bright or too dark, allowing for fine-tuning without retaking the photo.
The term also applies to in-camera settings. Here, photographers can adjust exposure to achieve the desired brightness.
49. Lens Correction
Lens correction fixes distortions from certain lenses. For example, it corrects barrel distortion, where straight lines bend outward. It also addresses chromatic aberration, which causes color fringes at the edges.
Post-processing software can automatically detect and correct many types of lens distortions, keeping images sharp and clean.
To Conclude
To take better photos, learn photography terms. Master basics like exposure and shutter speed, and explore advanced concepts like depth of field and bokeh. This will help you control your photos and boost your creativity.
Mastering these terms helps you communicate better, refine your technique, and capture stories through photos.


